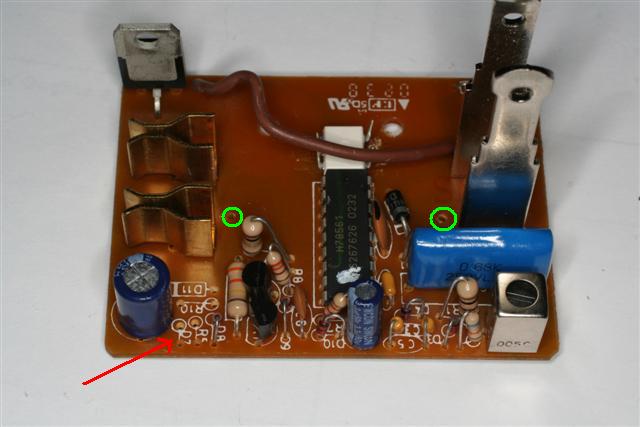
Open the X10 module as described
in the page linked above. Remove the PC board from the
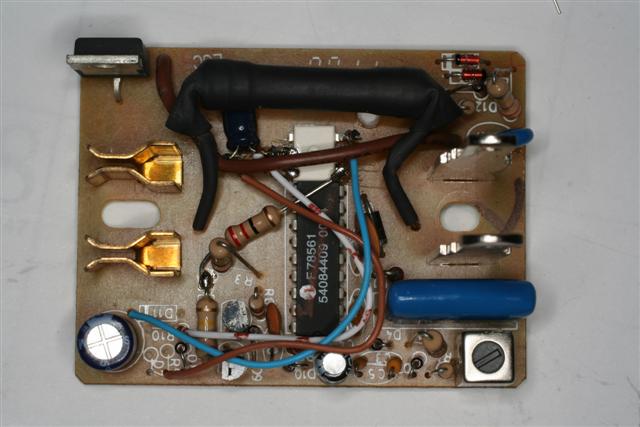
module. Remove the heat sink from the triac (upper left on
picture) and save the mounting hardware. Remove the choke (two
green circles) and remove D7, D11, R5 and R10. The board will
look like the picture when you are done removing the components.
You can reuse the 1k resistor (brn-blk-red). I prefer to use new
resistors since I don't have to worry about destroying the old ones
during removal, and since new parts have longer leads and
are easier to work with. The other electronic
parts may be discarded. Note the MOC3042 "dead
bug" glued next to the IC (pin one towards the lower left of the
photo). I also found the wiring easier if I broke off pins 3 and
5 before gluing the optoisolator in place.
|
|
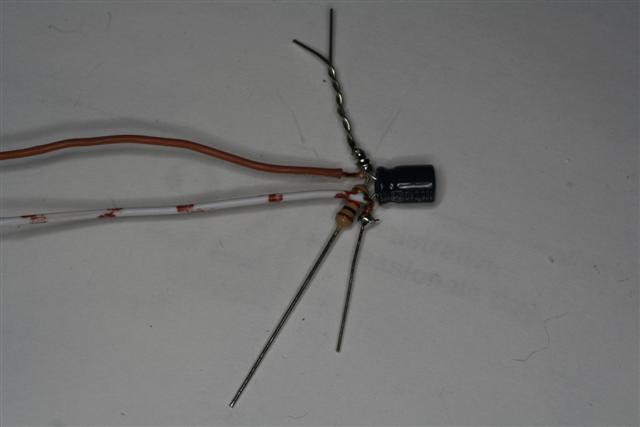
| Prepare the 22 uF capacitor and
1k ohm resistor as shown. Twist the positive (+) lead of the
capacitor and one lead of the 1k resistor together. Attach a
length of hookup wire to both the (+) and (-) sides of the
capacitor. Cut the free lead of the resistor and the neg lead of
the capacitor to 1/4" and form each onto a hook for connection to the
MOC3042. |
|
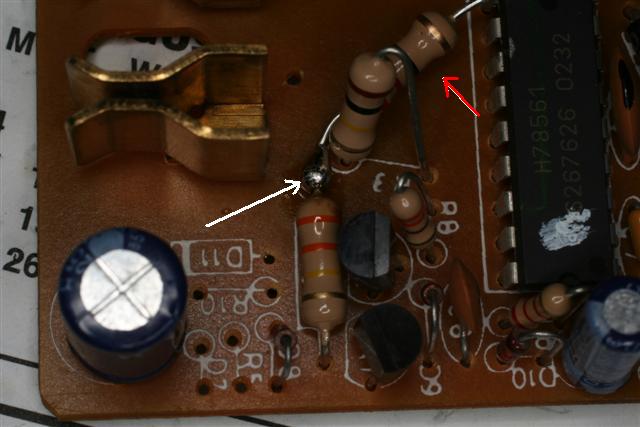
Next, cut one lead of a 22 ohn
(red-red-blk) 1/2 watt resistor to 1/2" and form a hook. Wrap the
hook around the lead of the 330k (org-org-yel) resistor at the
end shown and solder (white arrow) Place the body of the resistor
as shown (red arrow).
|
|
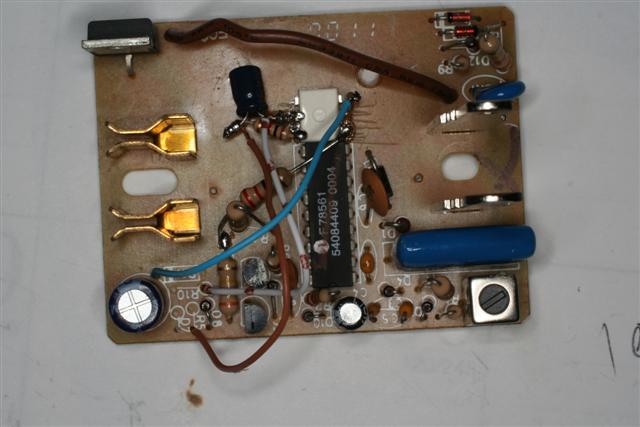
Wire the remainder as
shown. Connect the free end of the 22 ohm resistor you just
installed to pin 6 of the MOC3042. Connect a jumper between pin 4
of the MOC3042. and the hole that formerly contained the cathode
of D11 (next to the big capacitor). Connect the wire from
the positive pole of the new 22 uF capacitor to the hole formerly
occupied by R5 nearest to the edge of the circuit board. Finally
connect the lead from the negative pole of the 22 uF capacitor (pin 2
of the MOC3042) to the hold formerly occupied by the right side of R10
(the hole with the circle on the silkscreen and closest to the 330k
resistor.
|
|
Rather than putting a jumper in
place of the choke, I chose to put a 2.8 A 3AG slow blow fuse (with
pigtails) to enforce the 300 W limit. Wrap the fuse in heat
shrink and dress (route) the leads as shown (or you wont get the case
closed. Reinstall the heatsink after cutting the tab off as shown
on the page linked above. I recommend heat sink compound on the
triac when reinstalling. Reassemble the case, and voila,
completely silent appliance module with local control.
|
|